|
The Winchester 94 Cross-bolt
safety...what was Winchester thinking? They take one of the most
recognized guns in history, a gun many people recognize just
from the outline of it, and they grow it a wart. This is
probably the worst addition ever made to a rifle. John
Browning, the designer of the gun, probably did a back-flip
in his grave when Winchester pulled this one. I have liked the
Winchester 94 ever since I purchased my first one. The ease of handling. The
history. Not to mention it just did the job. Yes maybe not as
slick as some of the guns that came after it, but it did the
job. I have always thought of the 94 as a "no-bull"
type of gun. That is until the wart.
I first experienced this safety when a hunting
buddy and I decided we missed our old 94s that we had sold some
years before (a move I regretted the moment after money had
changed hands) after getting caught up in the belief we needed
more power, and a slicker gun. When I first looked at the gun I
was uneasy about the safety. I really missed the look of my
first 94. I had just about decided to forget the new ones, and
try to find an older model used in a gun shop, when the sales
lady at the local Kmart discovered the two guns they had in
stock had back to back serial numbers, and then all the
recent information about accidents replayed in my head. I
reluctantly decided to try it out, and we laid out the
$220.00 each for our guns.
The guns were Winchester 94 Rangers in 30-30.
Plain-Jane, no-bull guns. I took mine straight to the range to
try it out with the Winchester 170 grain Silvertips I purchased
with the gun. On my first attempt to shoot the gun, I discovered
my first problem. I would have to get use to popping the wart
out to the fire position. I shot up the box of shells, and
didn't have any more problems, but this problem turned into
something I could not get around to working out. After this
happened for the fifth or sixth time, I came to the conclusion
that my no-bull hunting gun wasn't so bull-free. I had to rid my
gun of this blemish. That or get rid of the gun. I refused to
loose another chance at an animal, or even a soda can,
because of this ugly design flaw. I would either fix this or go
to the Winchester plant and kick the person responsible for this
new improvement right in the rear.
My first task was to understand how the wart was
held on the gun the insides of this growth. I first checked the
owner's manual to see if there was any information that I could
use for this task. Nothing - it just told me how it
worked. I think I already knew that part. I just couldn't
remember to push the thing off before trying to pull the trigger. As
with any project I then looked to the web for help. After a few
minutes searching I found out how to remove the safety. You will
need a tool for this. It requires one paper clip. Yes, a paper
clip! Won't even cost you a penny. Straighten it out, and you
are ready to begin.
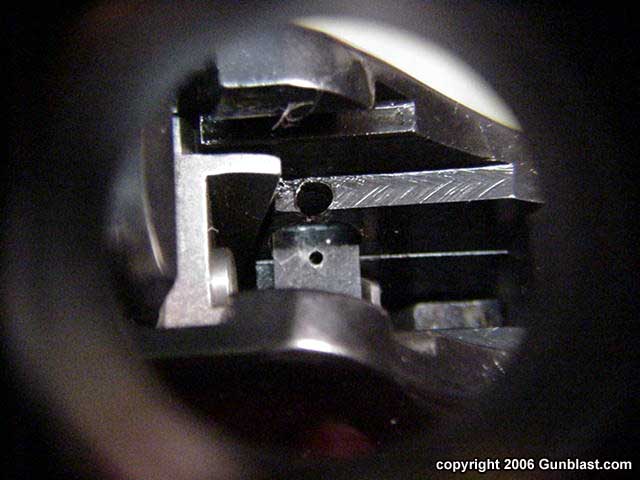
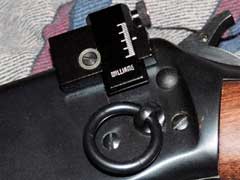
Figure 1 (see right) will show you the area that
you will be working in. First, as always, make sure the gun is
not loaded. Cock the hammer back and push the safety to the left. You will see on the right side of the gun, inside the area
pictured, little holes in the cross bolt . Line up the
holes and push the paper clip in until you feel the retaining
spring compress all the way. Now this will take a little
wiggling, but just take your time. Push the cross bolt to the
left side of the gun while holding the spring compressed in the hole. The
bolt will eventually work past the pin, and slide
completely out of the gun. You will have to work on this. It
is a little tricky because the paper clip is in the hole. The
trick is to release the bolt from the pin as you pull the clip
out of the hole and push the safety out. Be very
careful, as when the bolt comes free the retaining pin spring
will come out. You need to catch this spring, and the pin. You
may want to put the safety back in the gun at a later date,
so save the parts you remove.
After the safety was removed I had to address a
problem as bad as the looks of the wart: the holes left in the
sides of the receiver. What to do with these? I had read a great
deal on what others had done to correct this problem. They
either left the holes or threaded them - if you thread the holes
you will have to blue the threads before you put a screw in
place of the safety. This seemed like a lot of trouble, and
cost. Also, what if I wanted to sell this gun someday? I
might need to put the safety back in the gun, and the threads
might cause a problem with the function. Not to mention the
look of the gun. When the safety is put back in the
threads would be seen, making the gun uglier than ever. What to
do?
This proved to be the hardest part of the whole
project. I searched the web, gunsmiths, gunsmithing sites, and
just about every gun shop I could. I even called the company to
see if maybe they had something that might work. The woman was
very polite as she told basically that I was out of luck
because they where afraid of being sued. They couldn't help
with this problem, but she did tell me they had come out
with a new tang safety. A whole lot that does for me. What
to do?
I couldn't come up with anything. It looked as
if I was going to be stuck with either threads and screws, the holes, the
wart, or my foot up someone's butt. Then I would probably be in jail. I
have to say it might be worth it to be rid of that safety! I
was determined I was not going to give up. I did as I have
many times before when at a loss for what to do - I went to
the hardware store to see what I could find. If I couldn't find
a solution I would just have to thread the holes like everyone
else had.
At the store I looked through drawer after
drawer of knobs, screws, and this or that, but just as
I was about to go home to dig out the tap and die. I saw
the solution to my problem. So simple and so easy. A box
that read 1/4-inch nylon hole covers. They were even
black to match the gun, but would they stay in as I fired the gun? Would
I have to drive to the hardware store after every shooting trip? Would
they melt or deform as the gun heated up? Only one way
to find out: try it stupid! That's me talking to myself, not
you. I went home and slid them into the holes. Looked good.
Better than the wart or a hole in the receiver. The field would
be the test of my little project. So away I went.
I did this project in 2000, and I have yet to
replace the nylon hole covers. I have done this same project, and
more, on my other Winchester 94s. My trapper in .357 Magnum has
had a great deal of work done on it, all by me. The hole covers
on it have been in place since 2003,and not a problem. The
Ranger my buddy purchased? I own it as well. The covers have
been in it since 2004.To date I have never had to replace a
cover, or a problem with the overall safety of the gun. This
little project cost me a total of $1.50, including gas, per gun.
Not bad for a wart removal. A doctor would have cost a whole lot
more.
L.F. Combs
Ed. Note: This article is for
educational purposes only. Gunblast.com does not advocate
de-activating any safety device on any firearm, and neither the
author nor Gunblast.com assumes any responsibility for the
misuse of the information contained in this article.

Got something to say about this article? Want to agree (or
disagree) with it? Click the following link to go to the GUNBlast Feedback Page.
|
|
Click pictures for a larger version.
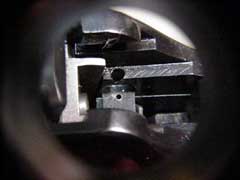
Figure 1: Looking down into the area between the firing
pin and the hammer, with the hammer cocked, showing the safety
bar (the flat part with the small hole).

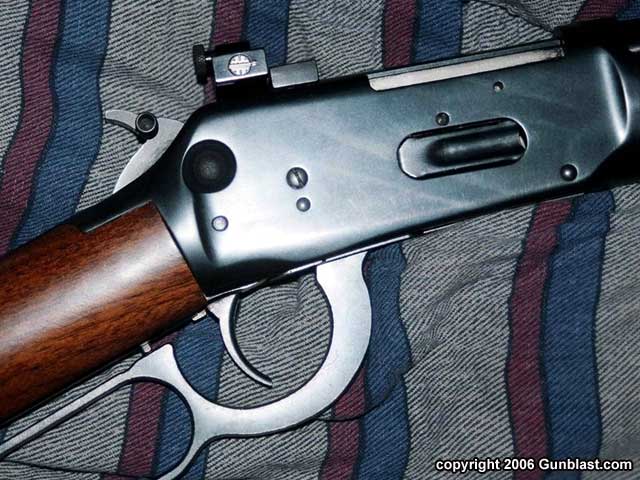
Author's method for removing a Winchester 94's
cross-bolt safety is effective, costs basically nothing, looks
good, and is easily reversible if desired.
|